ras2fim_install
Installation from 0
RAS2FIM uses conda to maintain a python environment, but requires the HECRASController, a utility which at present requires a graphical windows environment. There are documents available in the official readme that can walk you through the necessary steps to get RAS2FIM installed, so here I’ll outline the tweaks I make to that process to make my life harder than it needs to be, and executing and developing RAS2FIM a bit cleaner and more reproducible. The biggest difference between how I walk you through installation here and how the “official” or “recommended” documentation is that I like to keep things off my primary PC by making that starting point a fresh installation of a windows VirtualBox installed as I outline in how I install GIS.
Our larger workflow will involve:
- Installing VirtualBox
- Installing and setting up Windows
- And finally, setting up conda and the environment
1) Installing VirtualBox
- You should start by closing any other programs or windows. This explicit close step is important to a successful installation.
- Download VirtualBox here.
- Double click the VirtualBox exe and click through the guided installation.
- reboot your PC (you should really do this after every install)
2) Installing and setting up Windows
Building an image
This is the same rough procedure as outlined in spinning up a windows environment under the “Mac & Linux (via VirtualBox)” tab, with a few extra RAS2FIM utilities.
- Windows provides “evaluation” virtual environments of Windows 11 for development, available here. Download the VirtualBox version, and unzip it.
- In Oracle VM, go to File > Import Virtual Appliance and point to the Windows ova. Click next.
- Most of the defaults are fine, but I like to create separate folders of each VM I import. To do this, use the drop down underneath the table to select “other…” and create a new folder called Windows and click on the folder once to select.
- You will also most certainly want to increase the amount of RAM available: Conversion Chart. Because RAS2FIM is not a light program, it’s best to throw a decent chunk of RAM at it so that the RAS engine has enough room to open, close, and manipulate the files and calculations it needs to do.
Connecting your hard drive
- Finally, lets set up the instance. Right click on the newly added machine and go to settings. Most of the time these are sensible defaults, although there are a few things we can tweak.
- under the System dialog, feel free to increase the Base Memory to a reasonable amount, bearing in mind that the more you allocate to the vm, the less you have available on the host. Feel free to explore the other options but don’t change them unless you know what you’re doing or can handle a crash or two :)
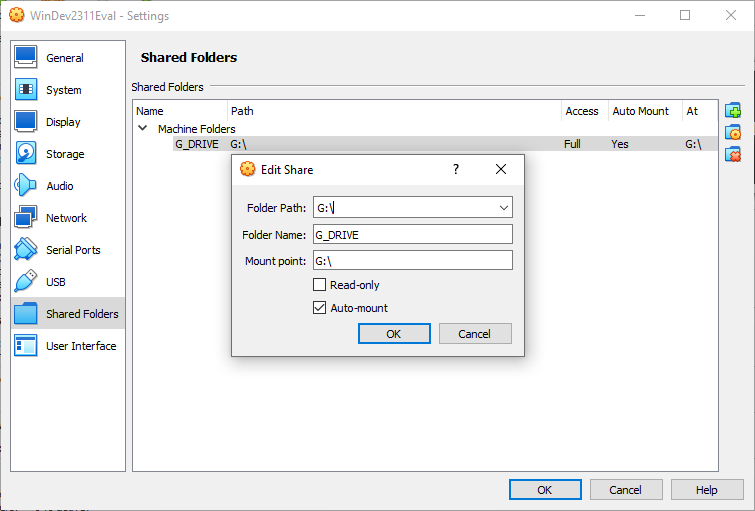
- Under Shared Folders, create a new folder (the icon with a plus)
- Point to a shared folder on your host machine (mine is called “hold” here)
- Select the Auto-mount option
- Change the Mount point to something sensible (like “G:")
- When launching this environment (and really any virtualization in general), it can be painfully slow to load. You might also see a few error messages that seem to sit there for a while and do nothing. An older thread points fingers at errors across a few sources to no solution but be patient and it should load and behave properly, take the dog for a walk.
- If you encounter flickering screens when using the new PC, under the Display settings, make sure 3D acceleration is unchecked.
Additional setup
Now that we have a fresh version of Windows, we can start following the standard RAS2FIM setup instructions. Here are pointers to some handy utilities and relevant docs that make working in this raw environment easier. Items marked with a checkbox are explicit installations to go though.
A last note: As you may have noticed, when you downloaded the VM image, there was an expiration date ~60 days from the date you downloaded it. You will either need to activate this version of windows, or delete and reinstall as needed. More recent versions I’ve tested seem to force reboot an hour after you start them, which is just enough time to start being productive and a real PITA.
3) Setting up RAS2FIM
At this point we are set up to follow the standard RAS2FIM installation procedures, recreated below for ease and completeness.
Note that Anaconda moved to a more restrictive set of Terms of Service in 2024, but miniforge is a drop-in replacement for that barrier. The ONLY changes you need to make are to:
- use
mamba, notcondawhen you use the commands in the instructions. - Replace the conda specific yml with the open channel alternatives:
```{md}
name: ras2fimv1os
channels:
  - conda-forge
  - nodefaults
dependencies:
  - python=3.8
  - affine
  - boto3
  - click<8.1.0
  - cloudpickle
  - dask-core
  - distributed
  - fiona>=1.8.13
  - folium
  - gdal>=3.0.2
  - geopandas>=0.12.2
  - h5netcdf
  - h5py
  - joblib
  - mapclassify
  - matplotlib-base
  - networkx
  - numpy<1.25.0
  - pandas<2.0.0
  - pyproj
  - pywin32
  - psutil
  - pyyaml
  - rasterio>=1.3.0
  - requests
  - rioxarray
  - rtree
  - s3fs
  - scikit-learn
  - scipy
  - shapely>=2.0.1
  - tqdm
  - xarray=2022.11.0
  - xyzservices
  - pip
  - pip:
    - colored==1.4.4
    - keepachangelog==1.0.0
    - python-dotenv==0.21.0
    - black==23.7.0
    - isort==5.12.0
```
```{md}
name: ras2fimv2os
channels:
- conda-forge
- nodefaults
dependencies:
- python=3.8
- affine
- boto3
- cloudpickle
- dask-core
- distributed
- fiona>=1.9
- folium
- gdal>=3.4
- geopandas>=0.12.2
- h5netcdf
- h5py
- joblib
- mapclassify
- matplotlib-base
- networkx
- numpy<1.25.0
- pandas<2.0.0
- psutil
- pyproj
- pywin32
- pyyaml
- rasterio>=1.3
- requests
- rioxarray
- rtree
- s3fs
- scikit-learn
- scipy
- shapely>=2.0
- tqdm
- xarray=2022.11.0
- xyzservices
- pip
- pip:
- black==23.7.0
- click==8.1.7
- colored==1.4.4
- contextily==1.3.0
- datashader==0.15.2
- geocube==0.3.3
- geopy==2.4.1
- keepachangelog==1.0.0
- numba==0.58.1
- python-dotenv==0.21.0
- xarray-spatial==0.3.5
```Aside: remove old environment
If you are following along with these instructions this step is not needed, but you might be recreating an environment and looking to this page for guidance so to be overly comprehensive, if you are trying to update or overwrite an environment, you should first remove and then reinstall the environment with conda deactivate and then conda remove --name {ENV_NAME} --all
Building the environment
- Clone the repo to your directory of choice:
git clone https://github.com/NOAA-OWP/ras2fim.git - From the Anaconda powershell prompt navigate to the top of the ras2fim repo folder and build the environment with :
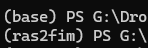
conda env create -f environment.yml - Activate the environment with:
conda activate ras2fim - If your window looks like this, you have successfully installed RAS2FIM on your system!
Pulling core datasets
The last step we need to accomplish is to gather the key national datasets necessary to run the utility. While many of these can in thory be swapped out for your own custom representations, the utilities were developed and in some cases baked into the underlying logic of the program. You grab those at either the repo or here.
Congratulations! RAS2FIM is now locked and loaded to run! Your next steps depend on what you want to accomplish, but if you’re at a loss, the two sample sets of data are staged and ready to test. See the run RAS2FIM over sample data page for more details.