A basic map in Google Maps
Google Earth is a great platform to start your exploration of the GISciences, even if it’s not a tool you’ll use often in “the real world”. There are a number of ways to access Google Earth, but this tutorial will cover Google Earth Pro on the Desktop (scroll to the bottom of the page). The objective of this exercise is to familiarize yourself with the numerous tools Google Earth has to offer. By the end of this tutorial, you should feel comfortable…
- navigating around the world, and reorienting yourself if you get lost.
- adding data and exploring it’s format
- symbolizing features
- creating a map, adding common map elements, and exporting an image
Outline:
| Data Name | Description |
|---|---|
| test | Handout to turn in |
most of this section is gratefully pilfered from the official Google Earth help page
Open Google Earth and spend some time practicing navigating around in the world.
Use a mouse to change your perspective and explore different areas.
- To pan in any direction: Left-click and hold. Then, drag the cursor until you see the view you want.
- To return to the default view (reorient yourself so north is up and the camera angle is pointed straight down) - Click the map and press r.
- You can zoom in and out to see more or less of a map area. Use the scroll wheel on your mouse or mouse touchpad to zoom in and out.
- The map controls on the upper right hand side of the map can also be used to pivot, pan, and zoom using just the mouse.
- Finally, there is a search bar on the toolbar on the left that works just like the search bar on Google Maps.
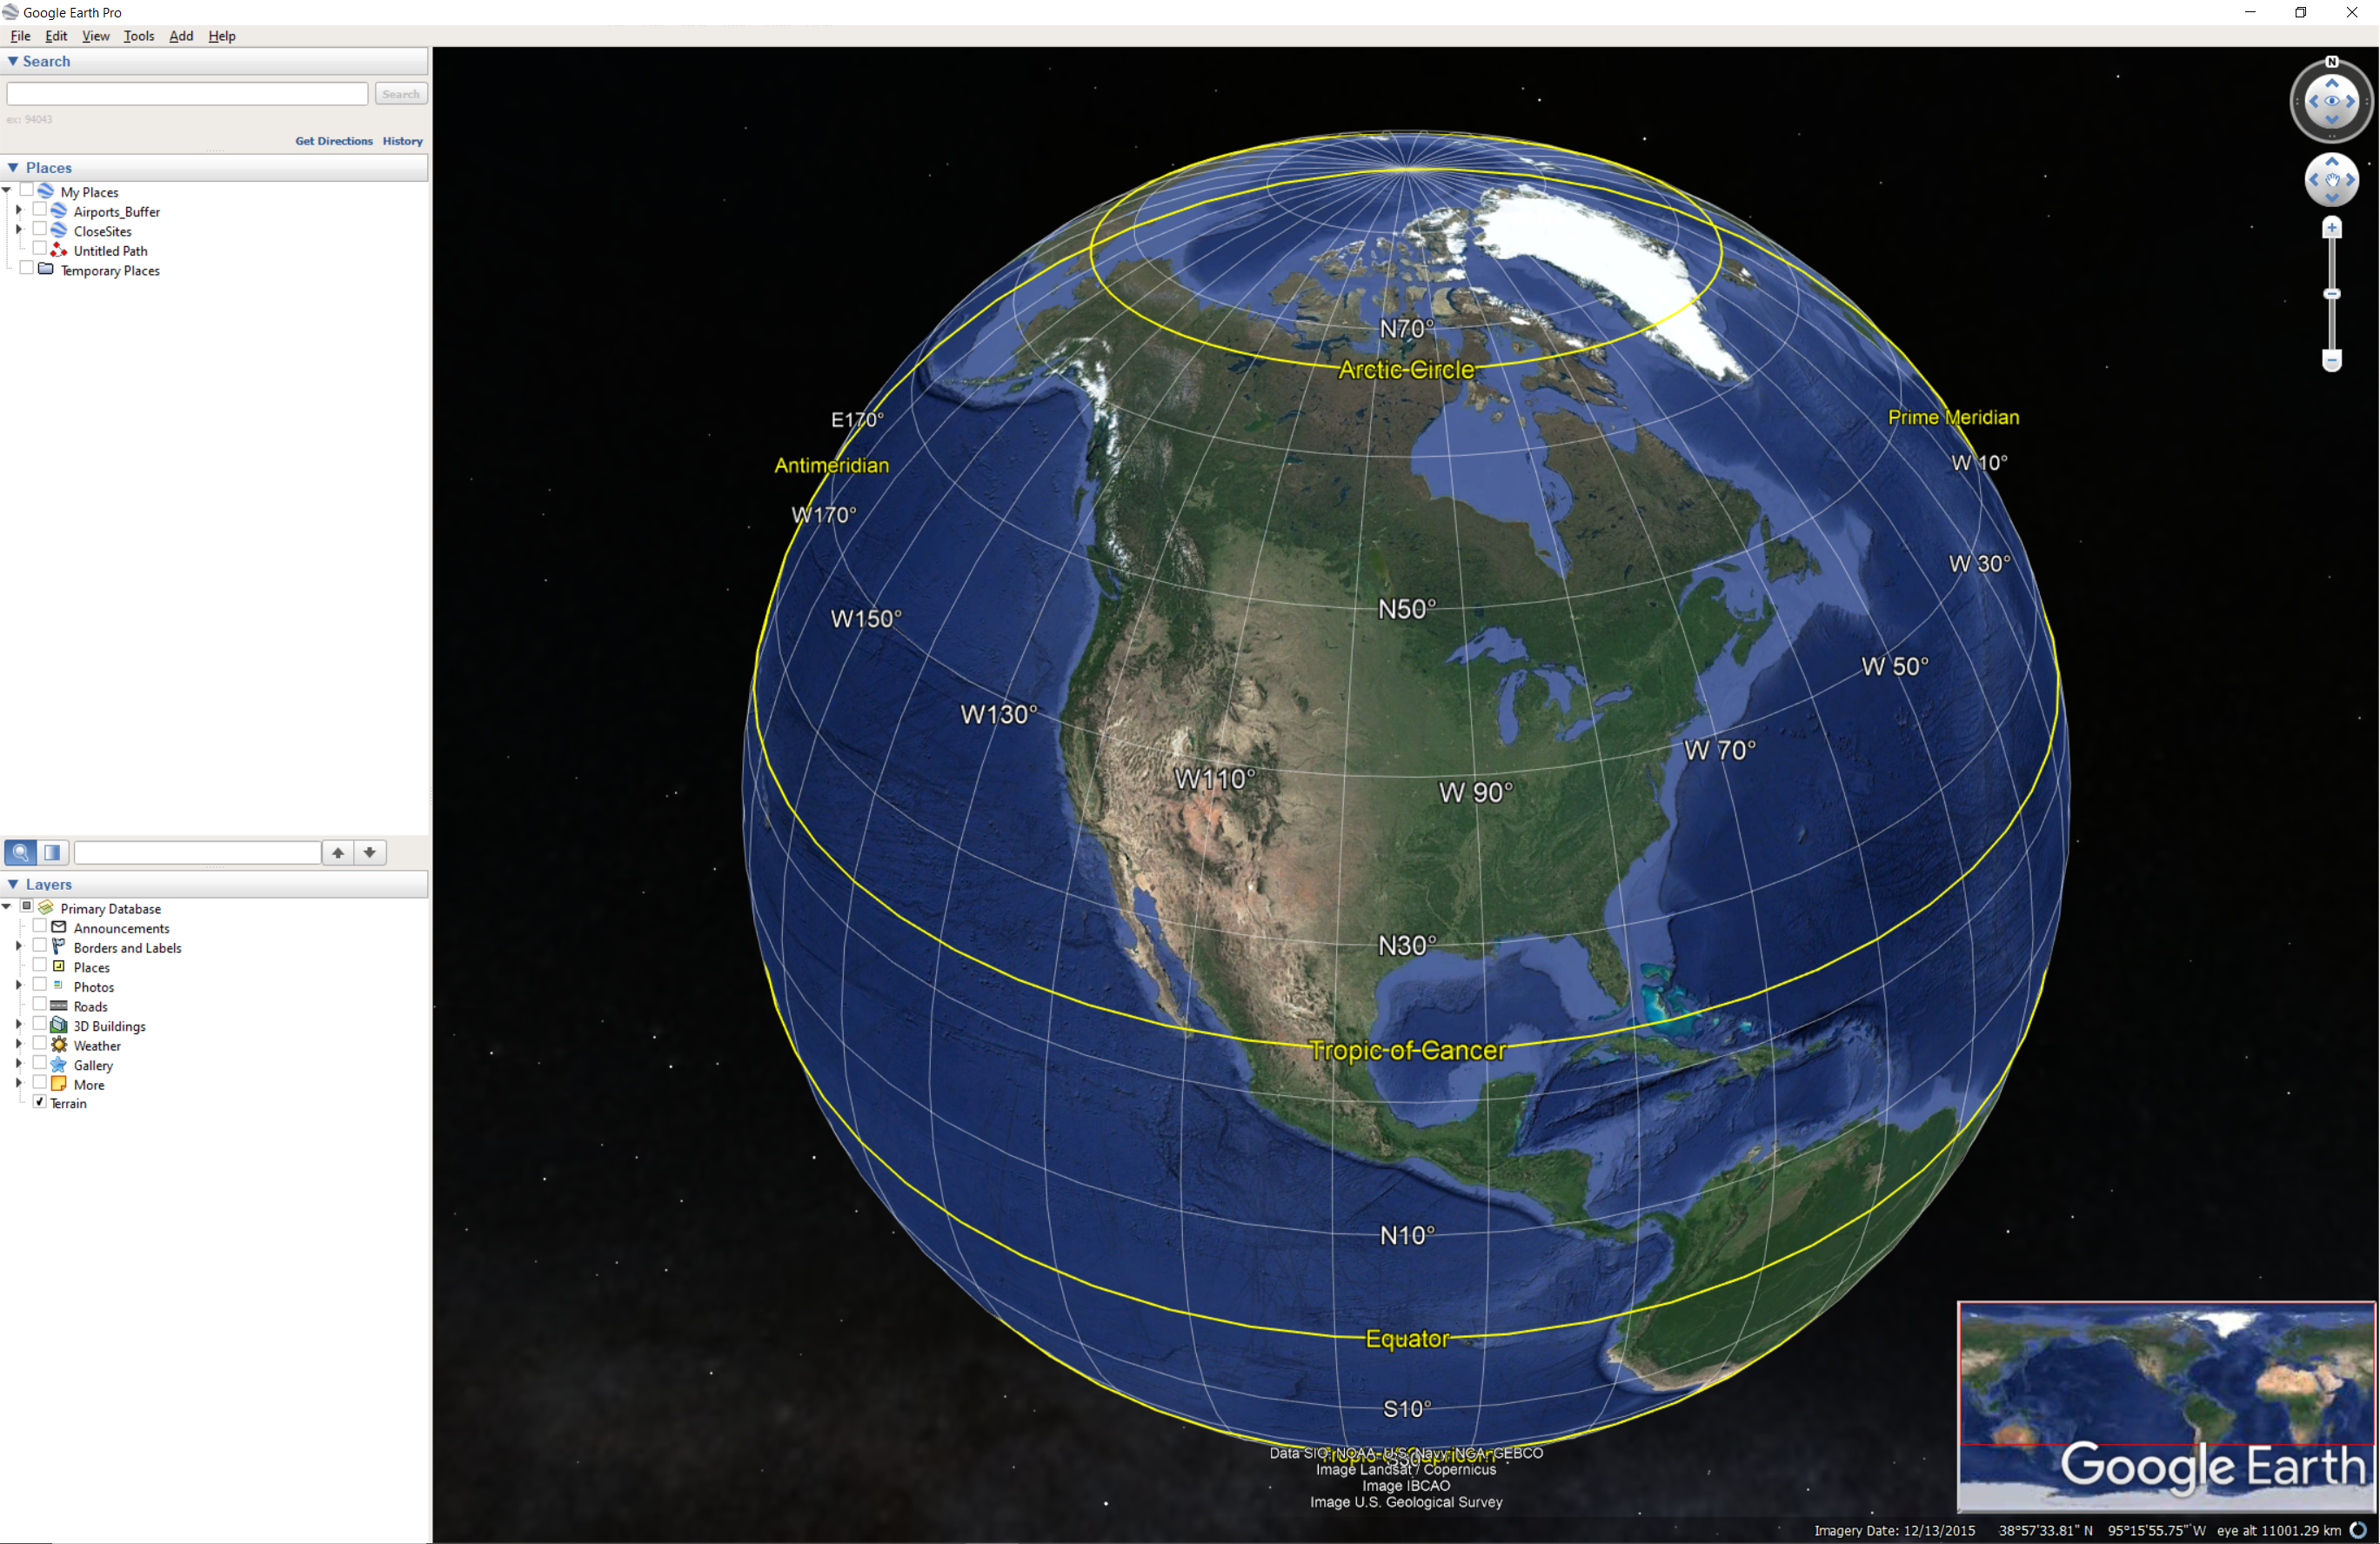
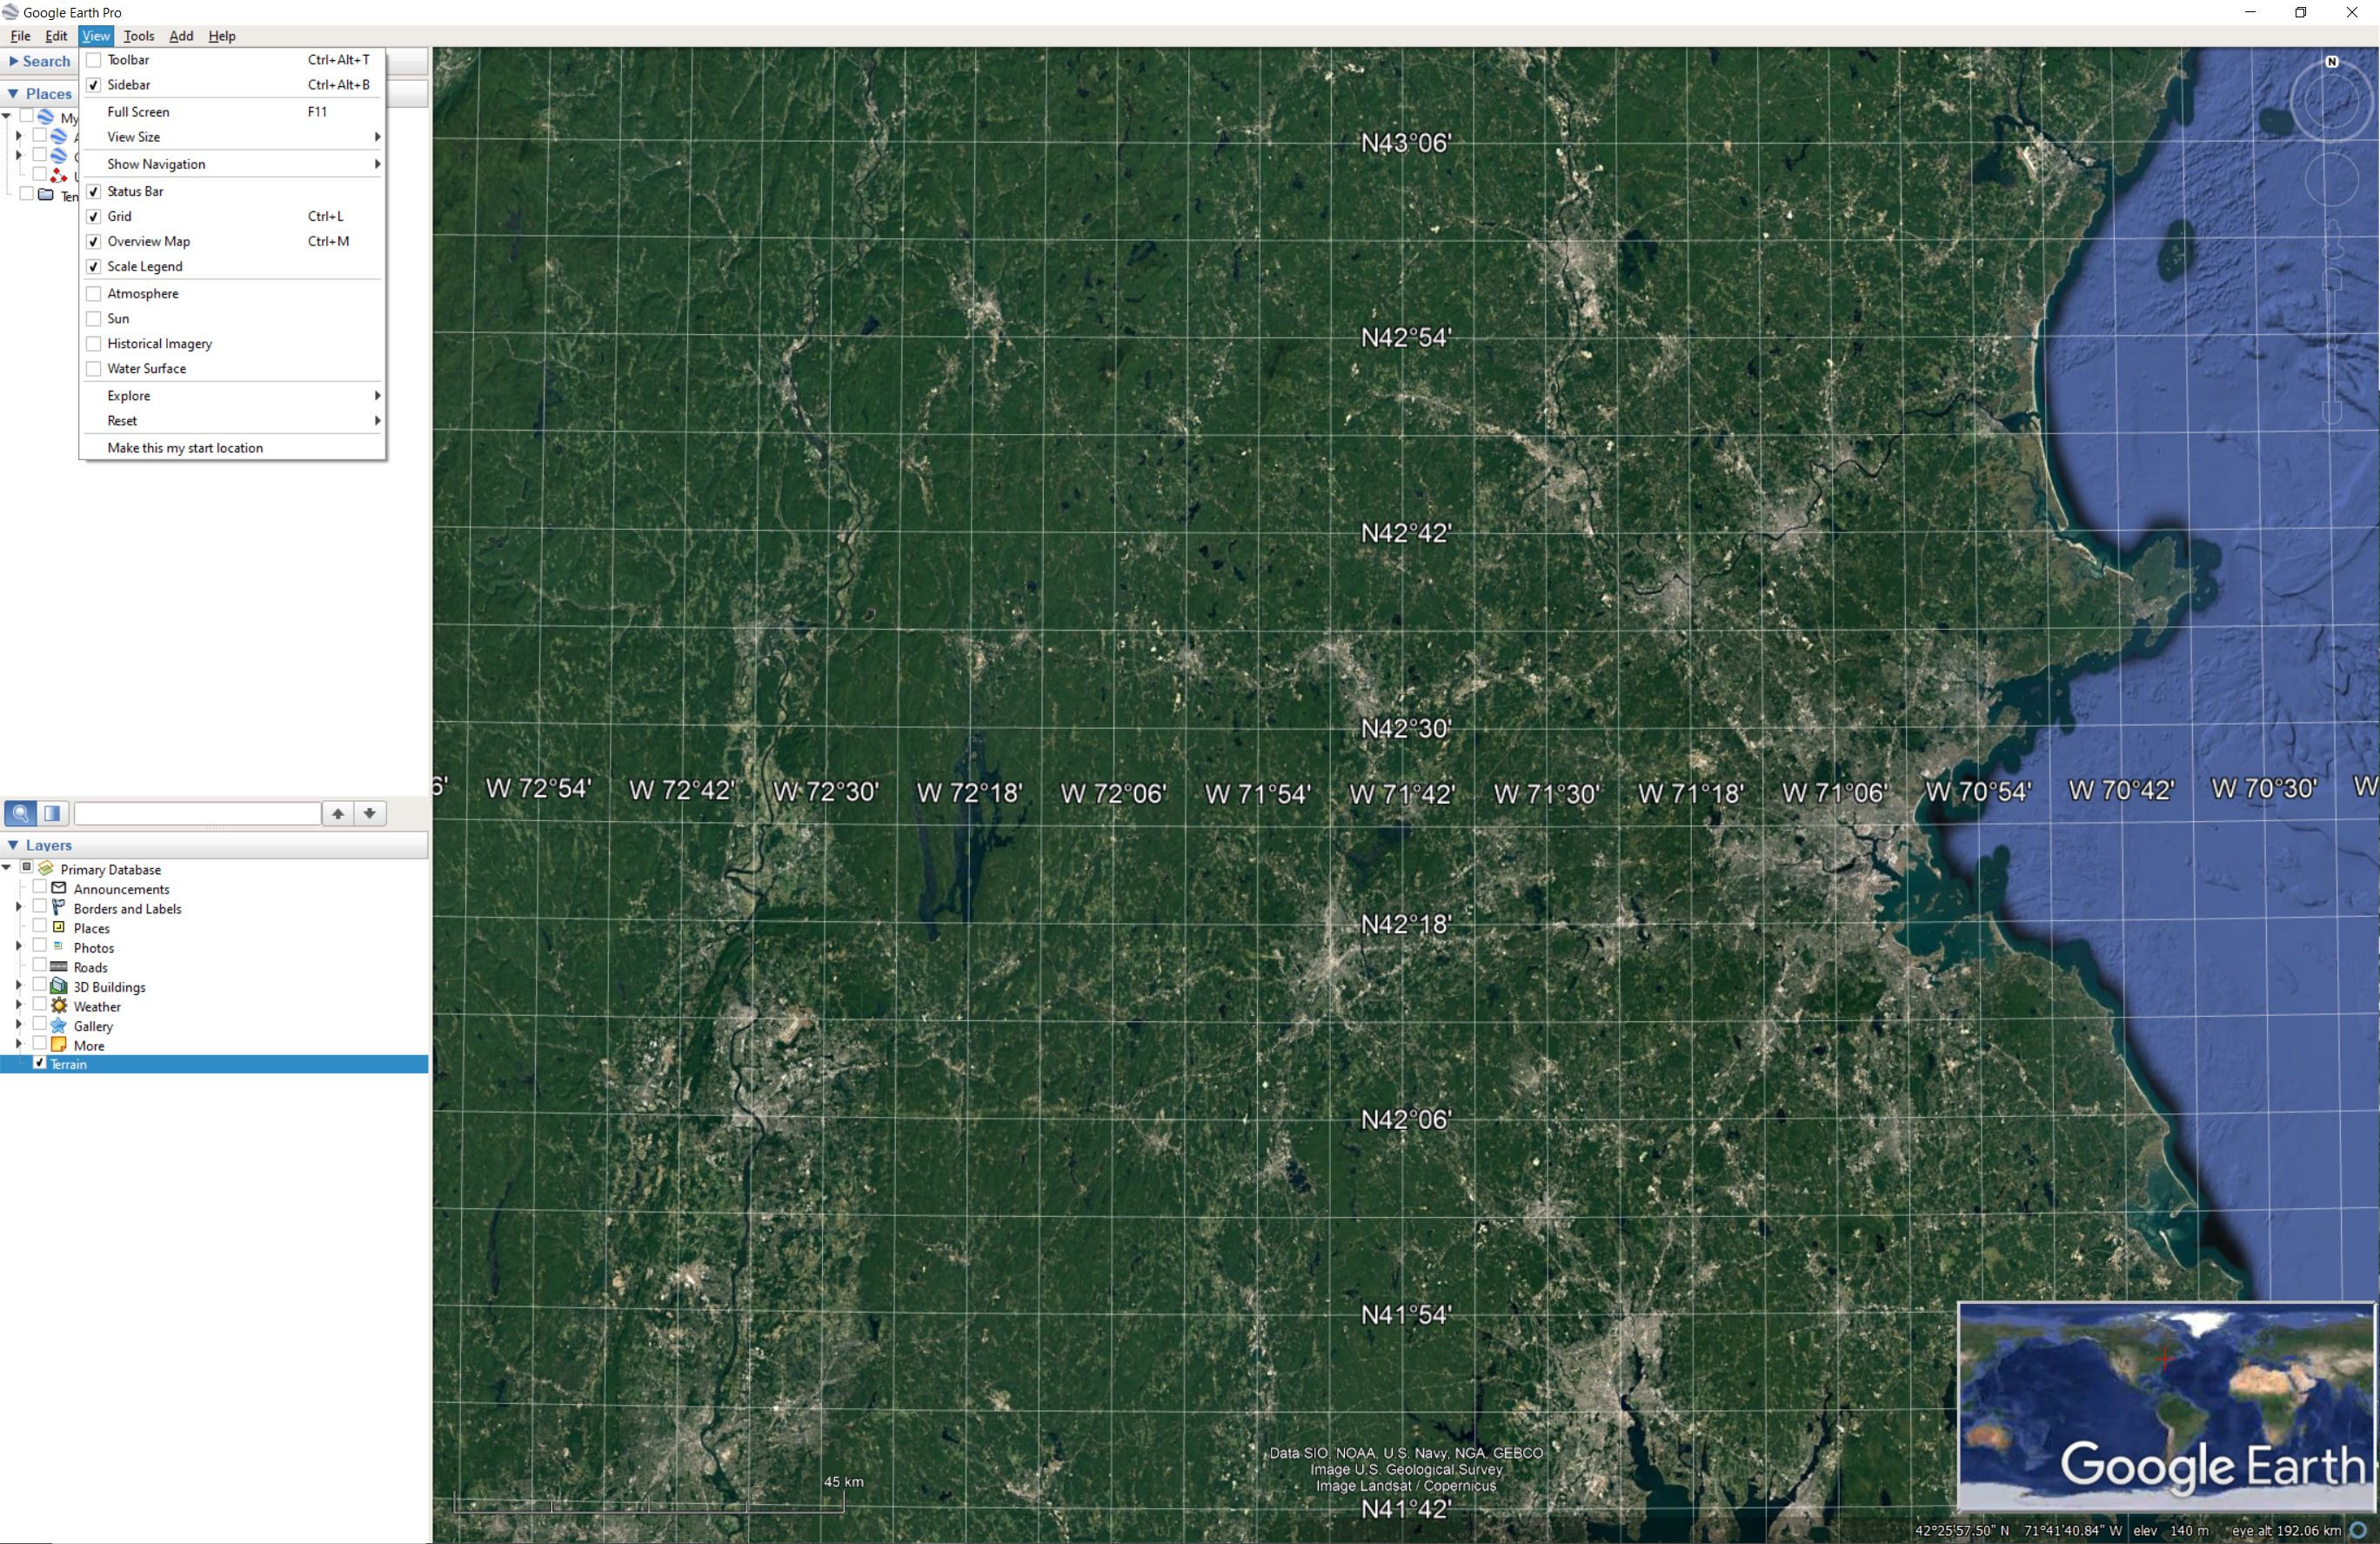
There are a number of options to explore in Google Earth, particularly under view and tools. For now, the only one you should turn on is the overlay map, which creates a small inset which shows where we are in relation to the rest of the globe.
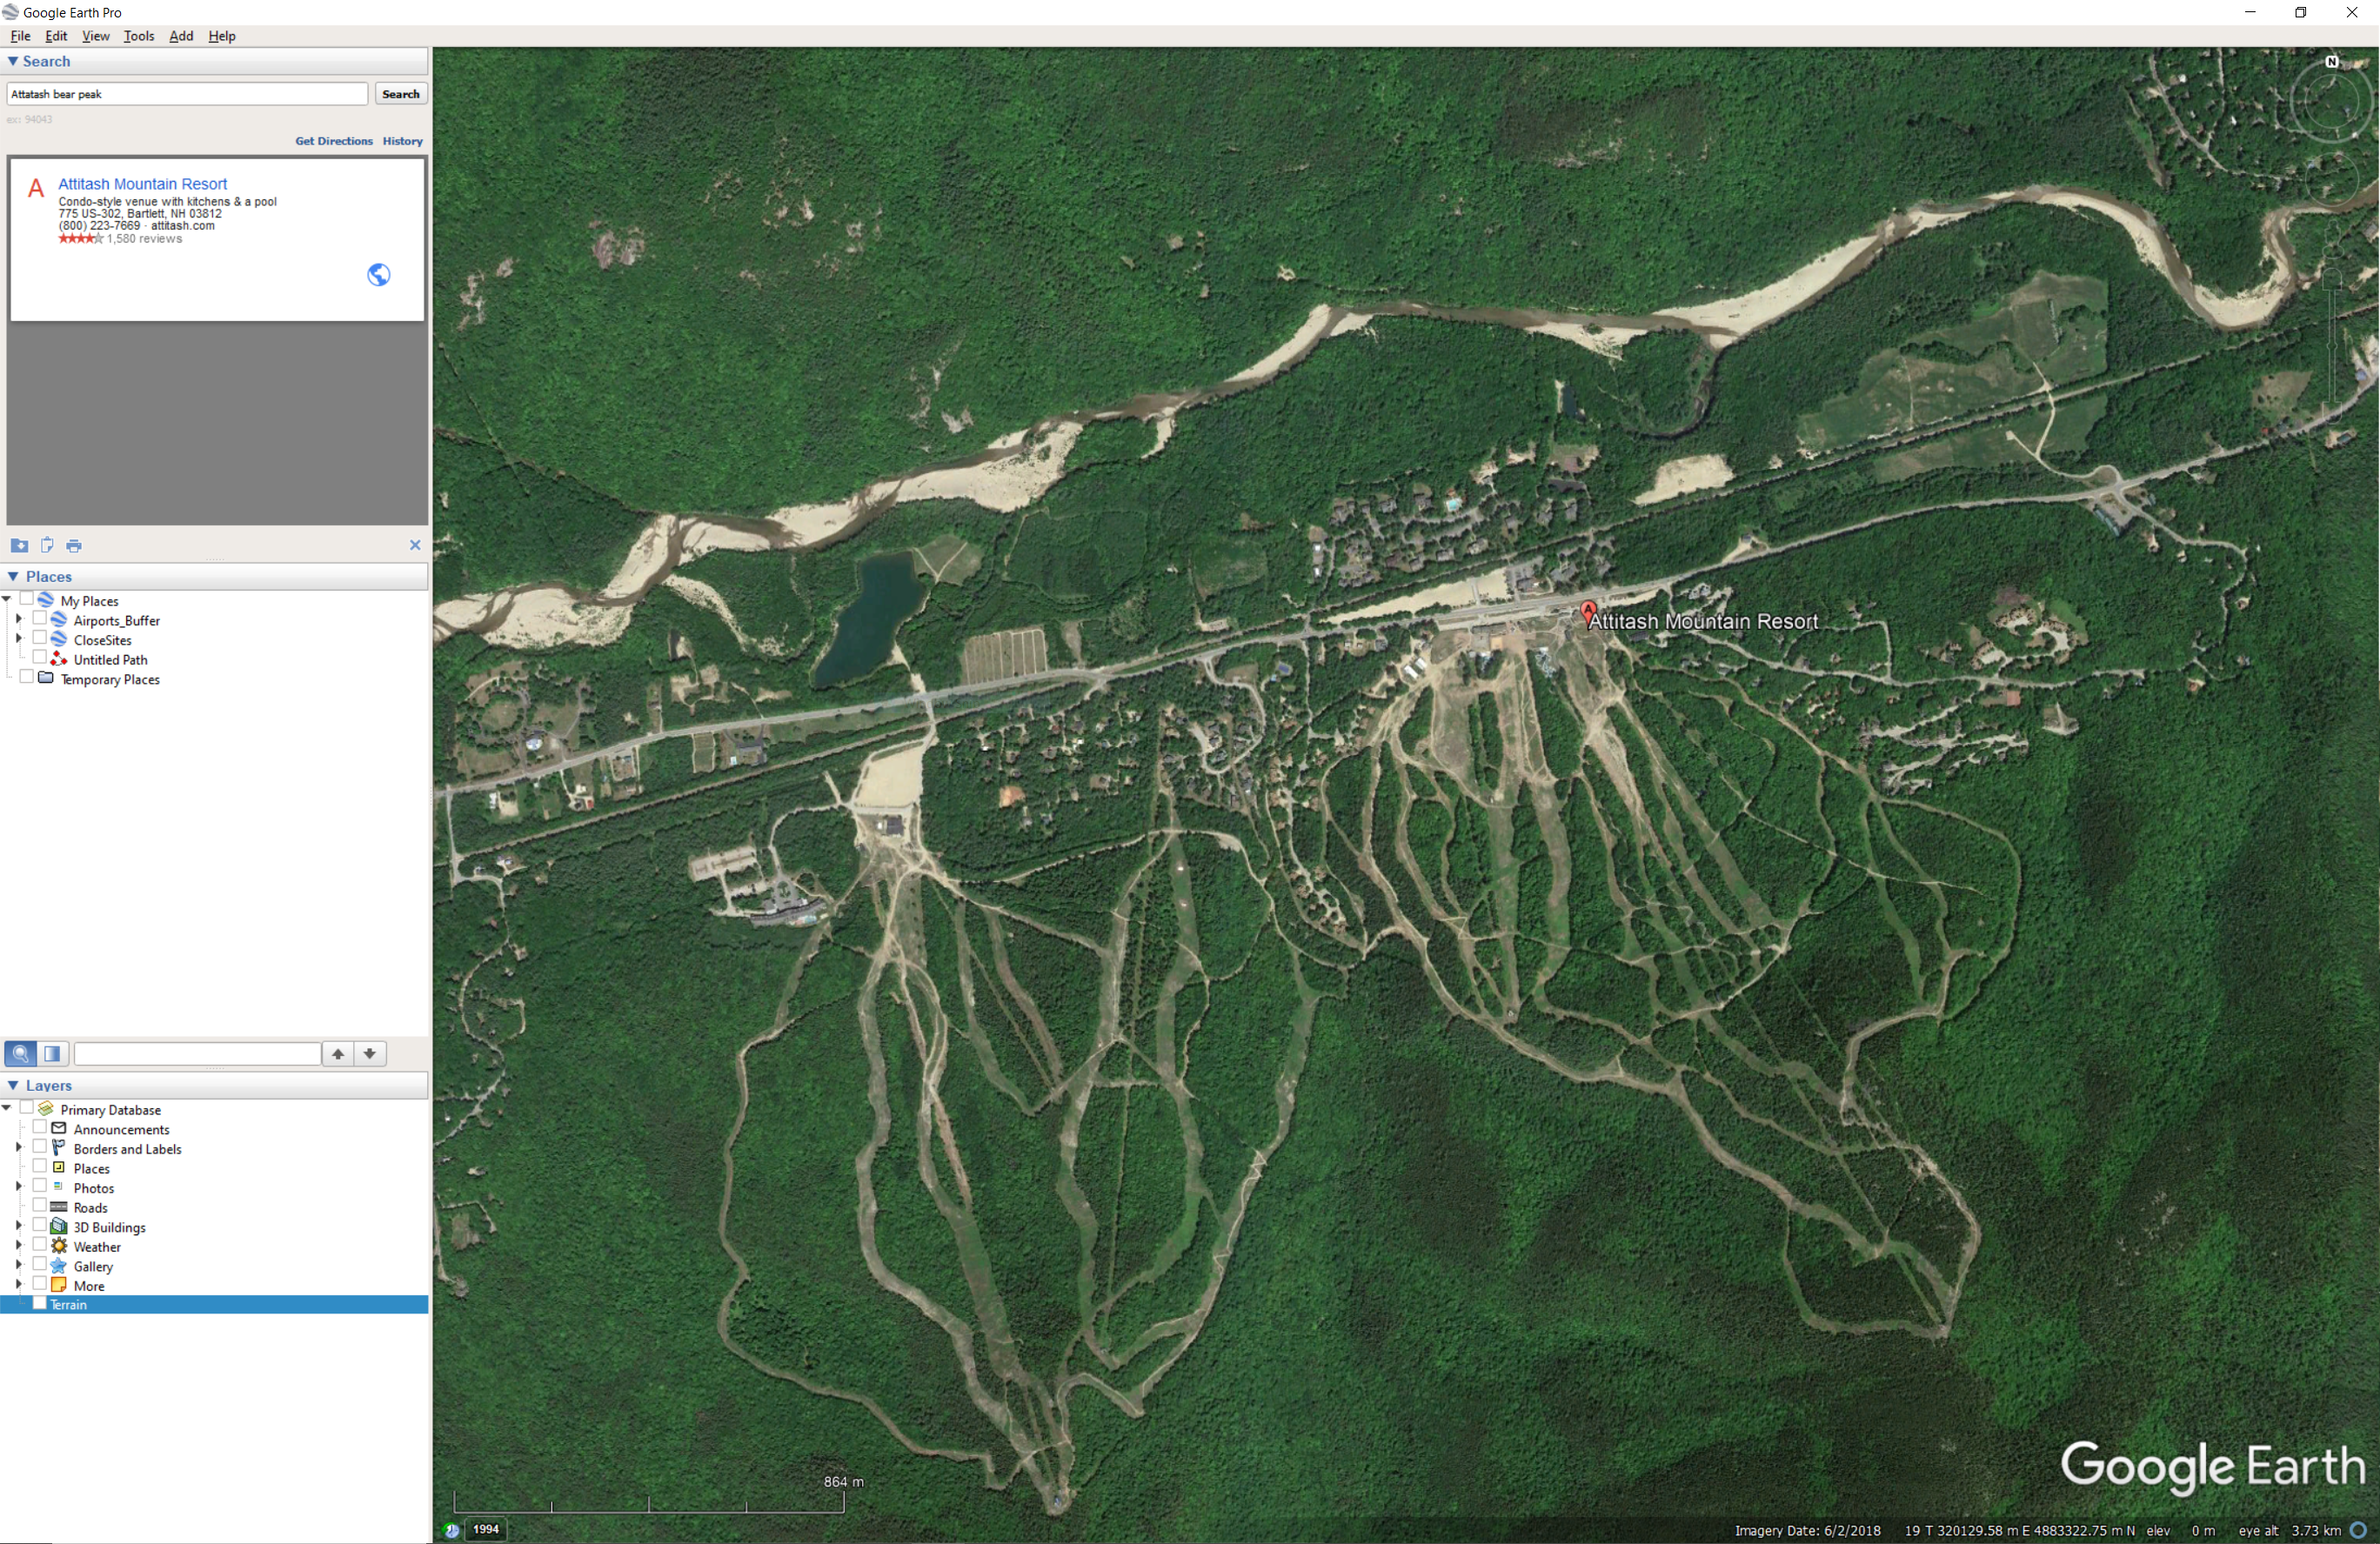
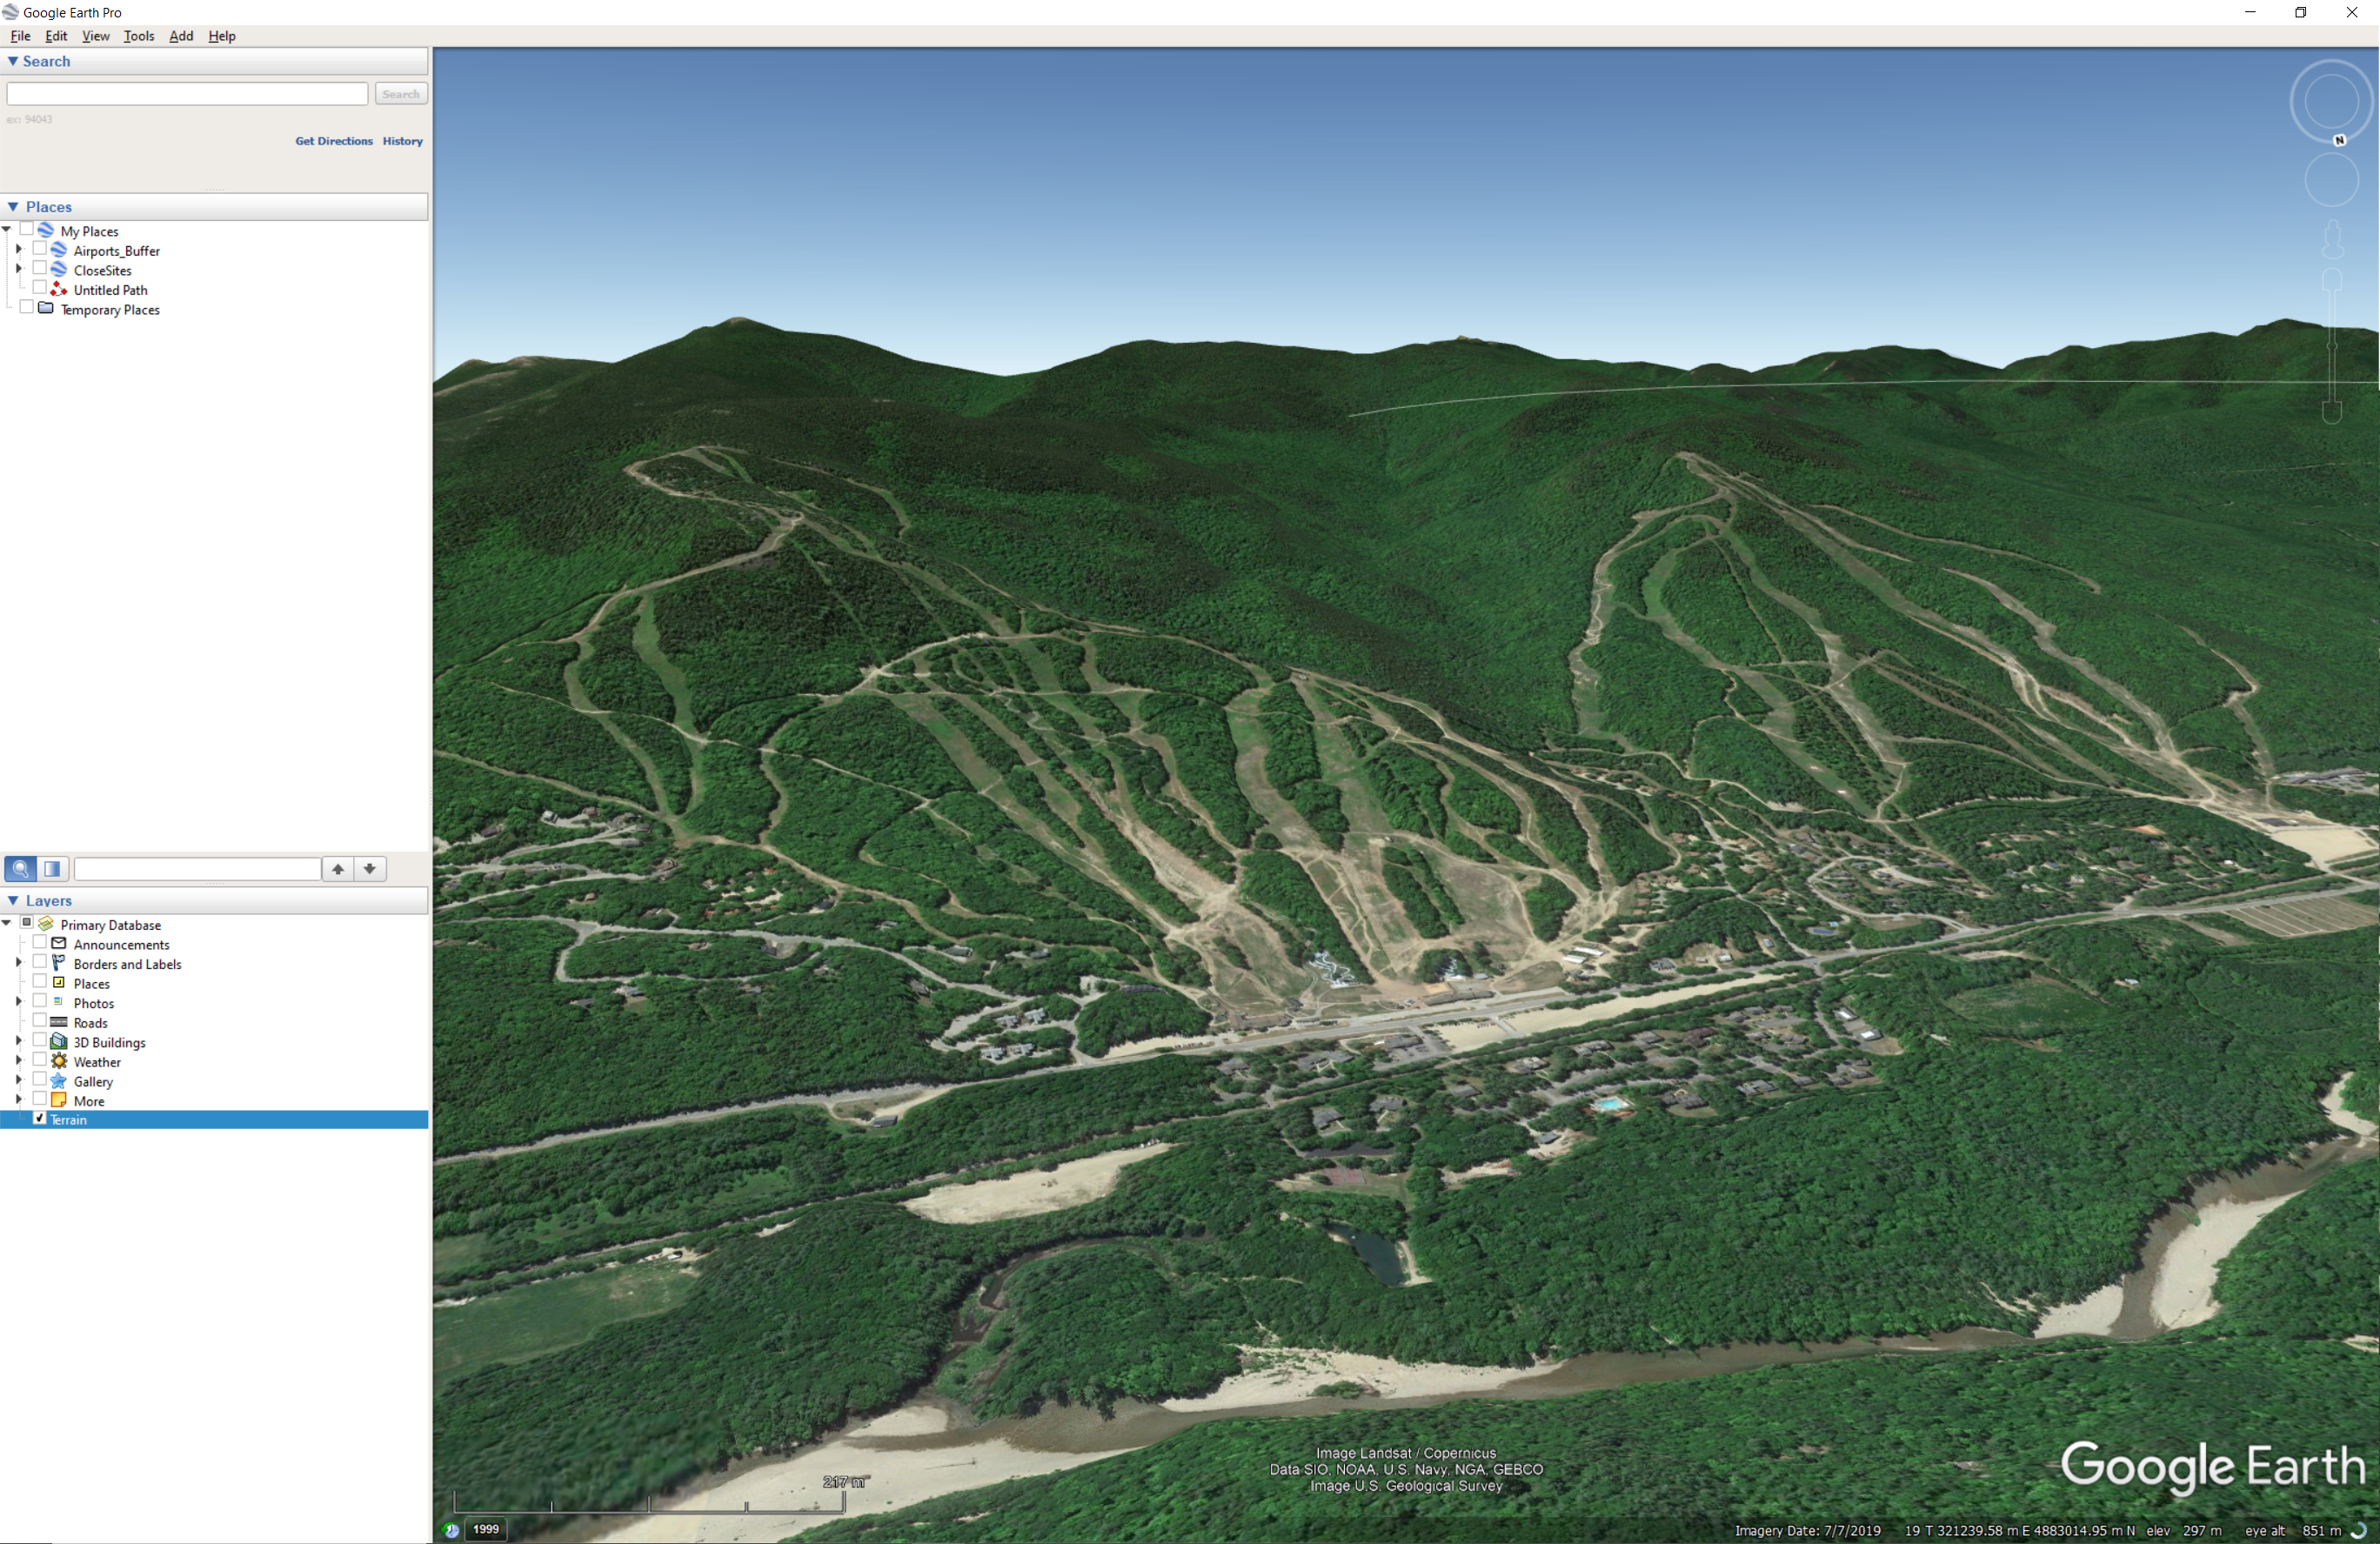
Google earth can be used to view elevation, make sure you turn on Terrain under Layers on the left first.
Windows & Linux
- Press Shift + Left-click. Then, drag in any direction.
on Mac
- Press and hold the scroll button. Then, move the mouse forward or backward.
- Press Shift and scroll forward or backward to tilt up and down.
Google Earth has a build in flight simulator, and you can use either the keyboard and mouse, or a joystick!
- In the menu: Click Tools and then Enter Flight Simulator
- In the next screen, you can choose the plane you use, and your starting point
- The Heads up display has the following elements:

- Speed: current speed in knots
- Heading: direction the aircraft is pointed
- Bank angle: angle you’re using to slowly turn the plane in a new direction
- Vertical speed: rate of ascent or descent in feet per minute
- Exit flight simulator feature: click this button to exit the flight simulator
- Throttle: level of the engine’s power
- Rudder: angle of the vertical axis of the plane
- Aileron: angle of the plane when you roll or bank it
- Elevator: angle and lift of the plane’s wings
- Flap and gear indicators: where the flaps and gears are set
- Pitch angle: angle between where the airplane is pointed and the horizon in degrees
- Altitude: how many feet above sea level the plane is flying
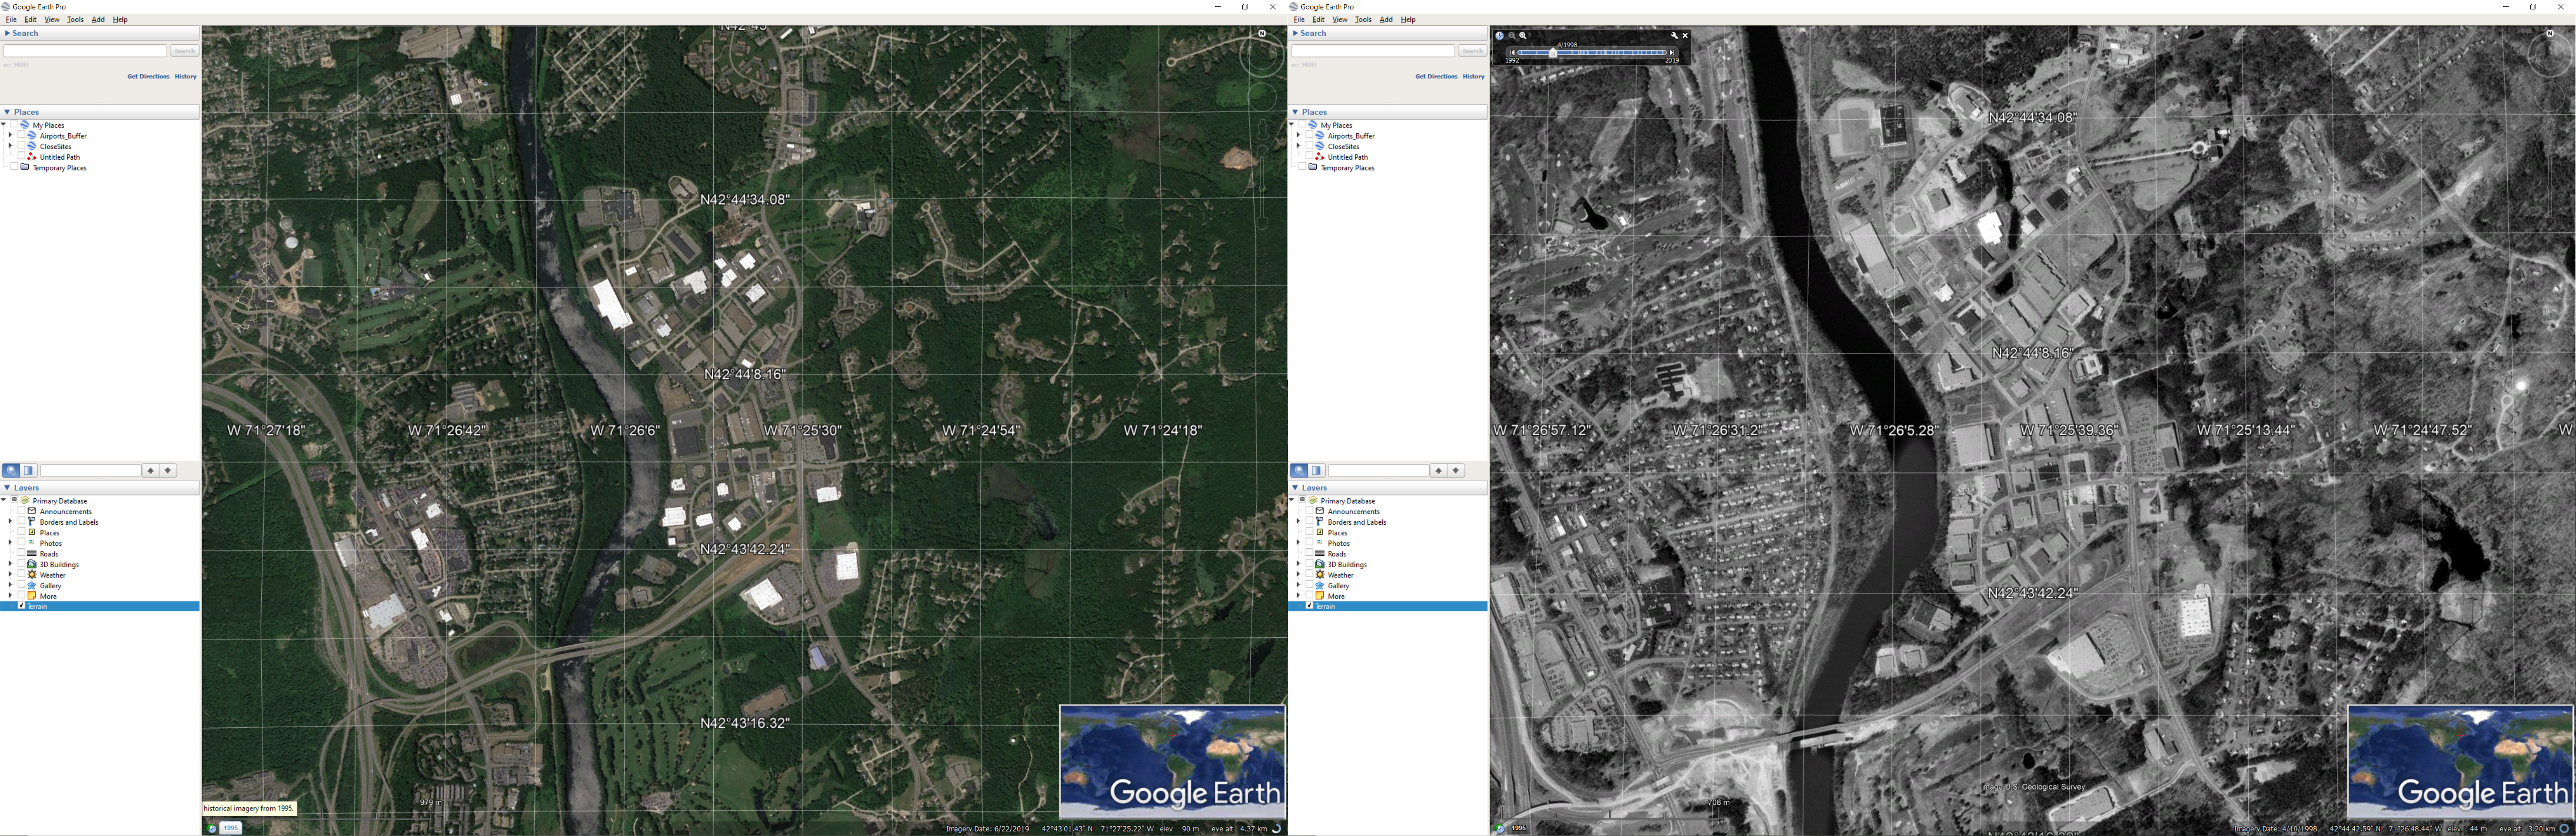
Google is one of if not the leading collector of earth observations, and that includes past satellite and aerial imagery. To view past images, scroll in close enough until the clock on the lower left of the map appears, and click on it. You can also use the slider at the top right of the map to page through imagery.
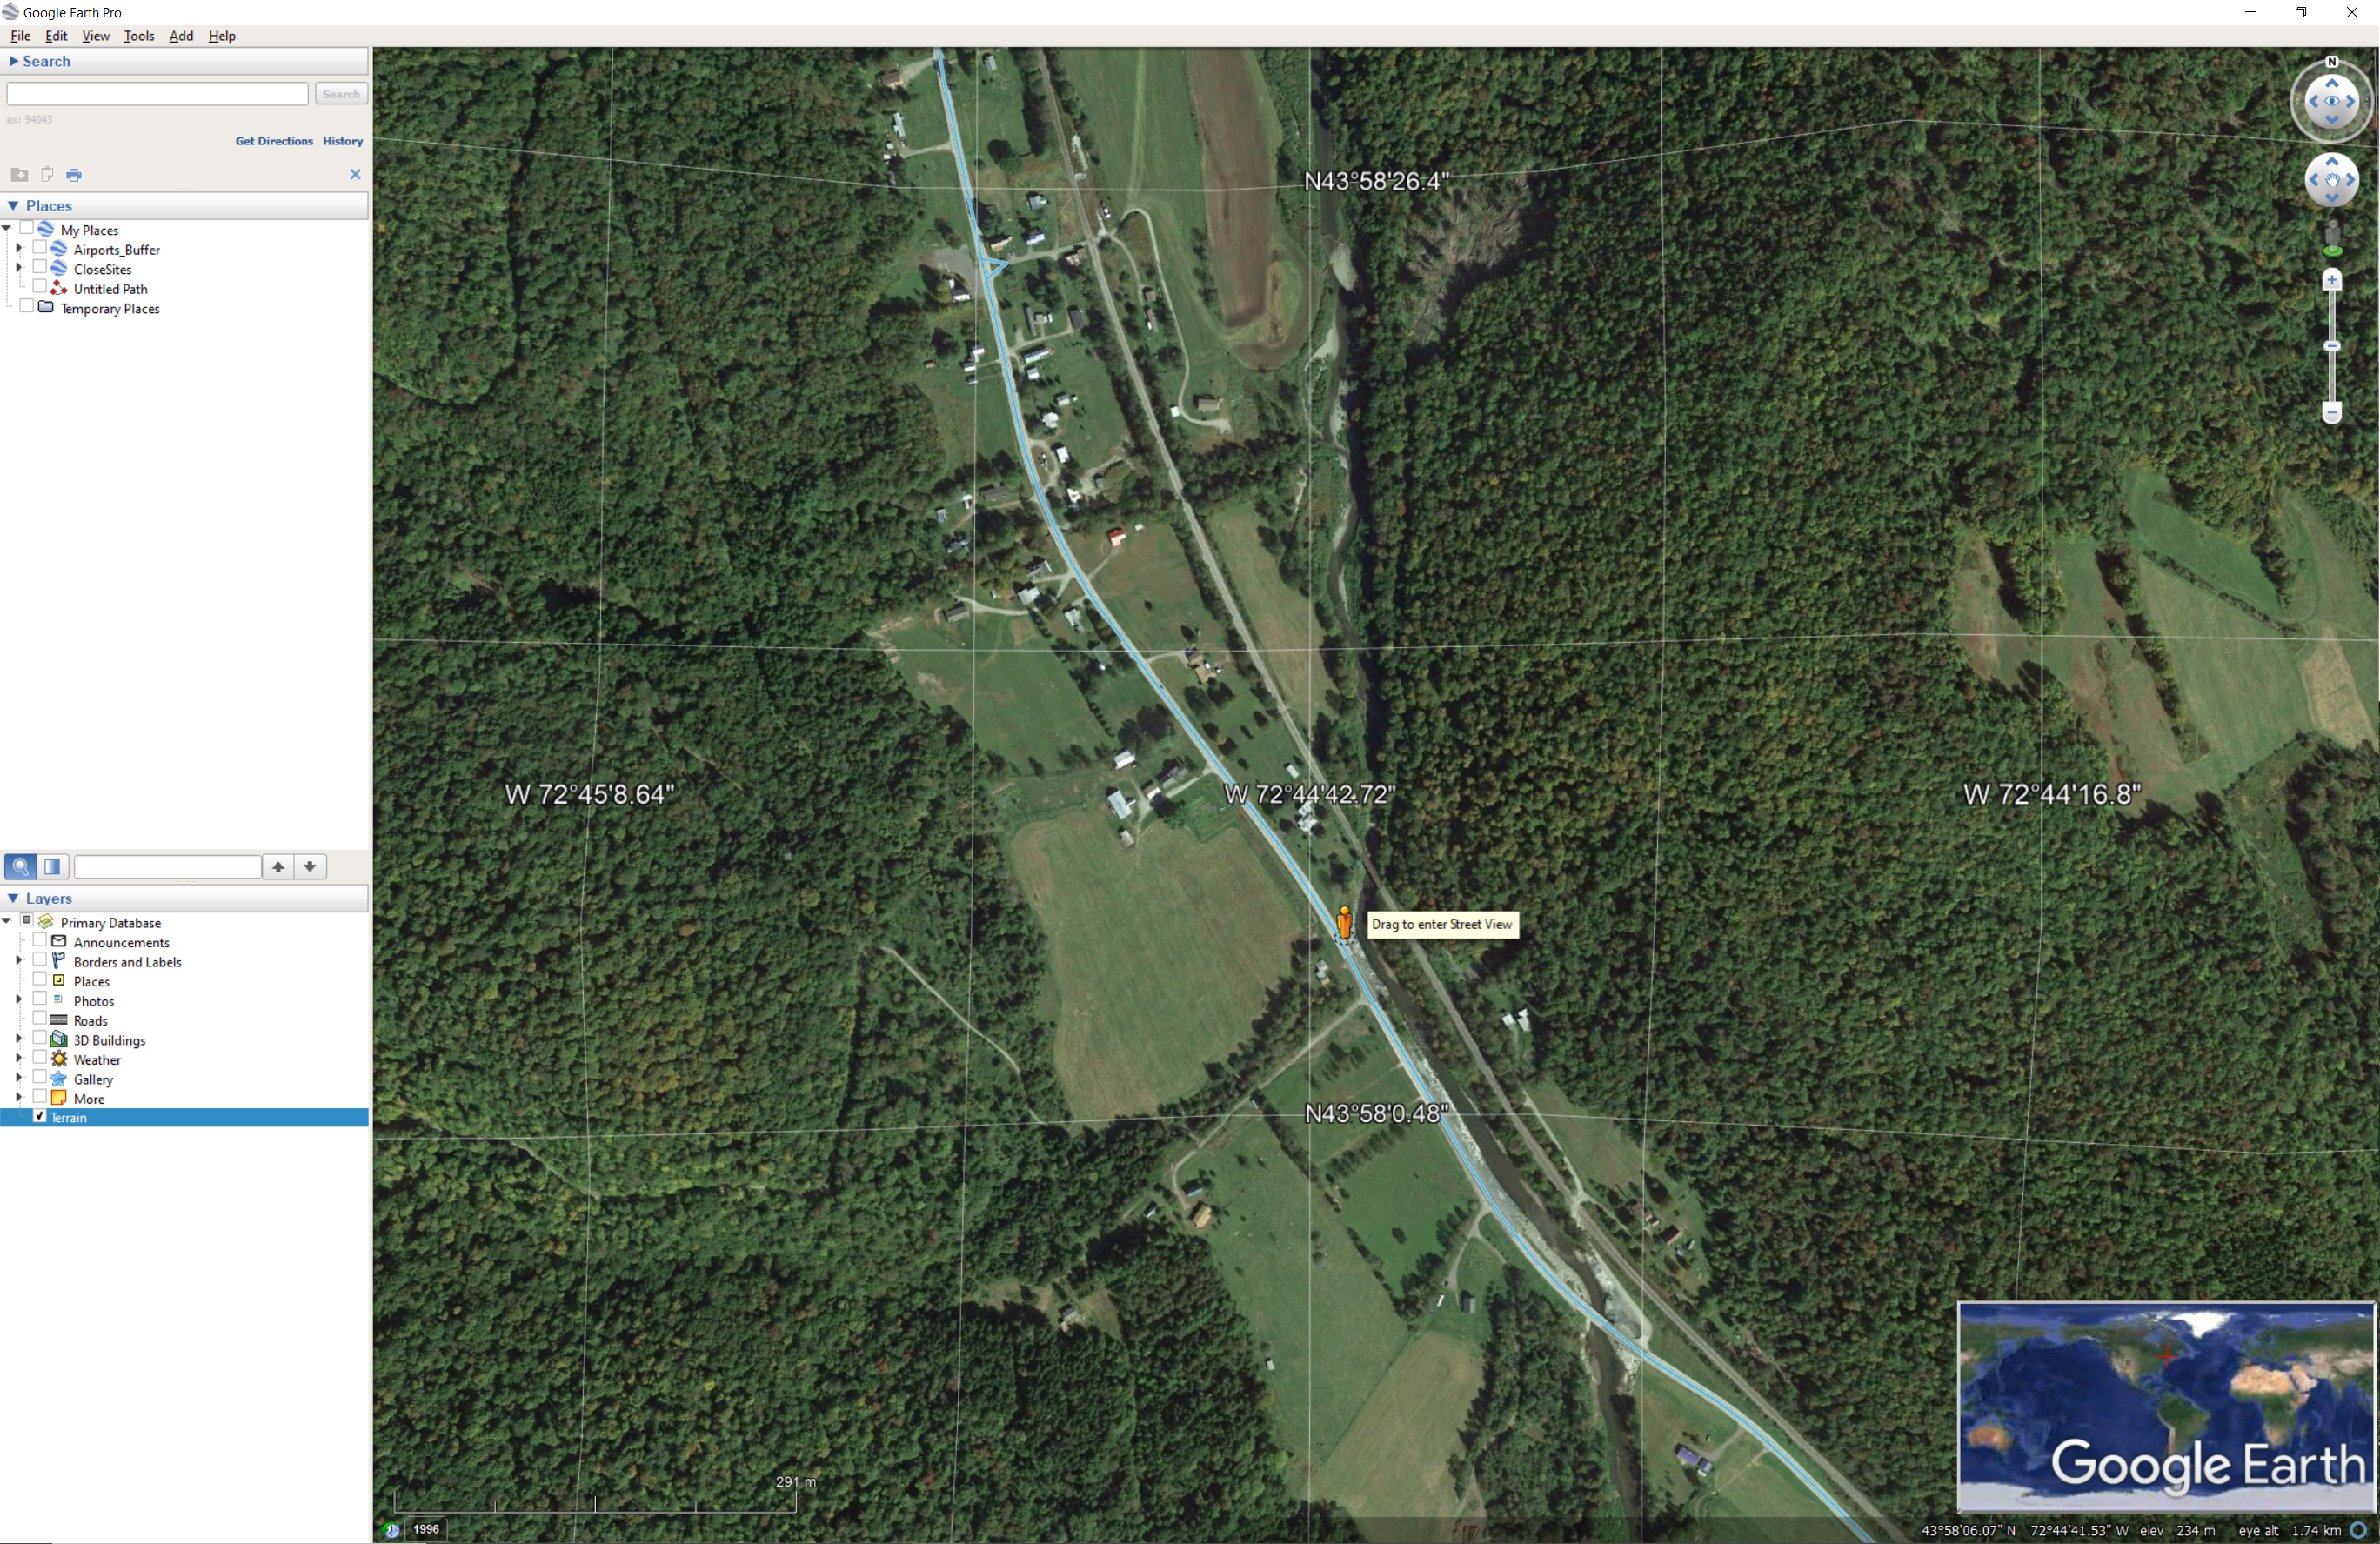
Google earth also has a pegman you can drop to see street view imagery.
Google Earth can load in GIS data, and it’s native format is KML/KMZ. Here is some data we’ll use to create our map. Download it, and then add it to the map using file > open. Finally, turn off all layers except terrain. When finished, your screen should look like so.
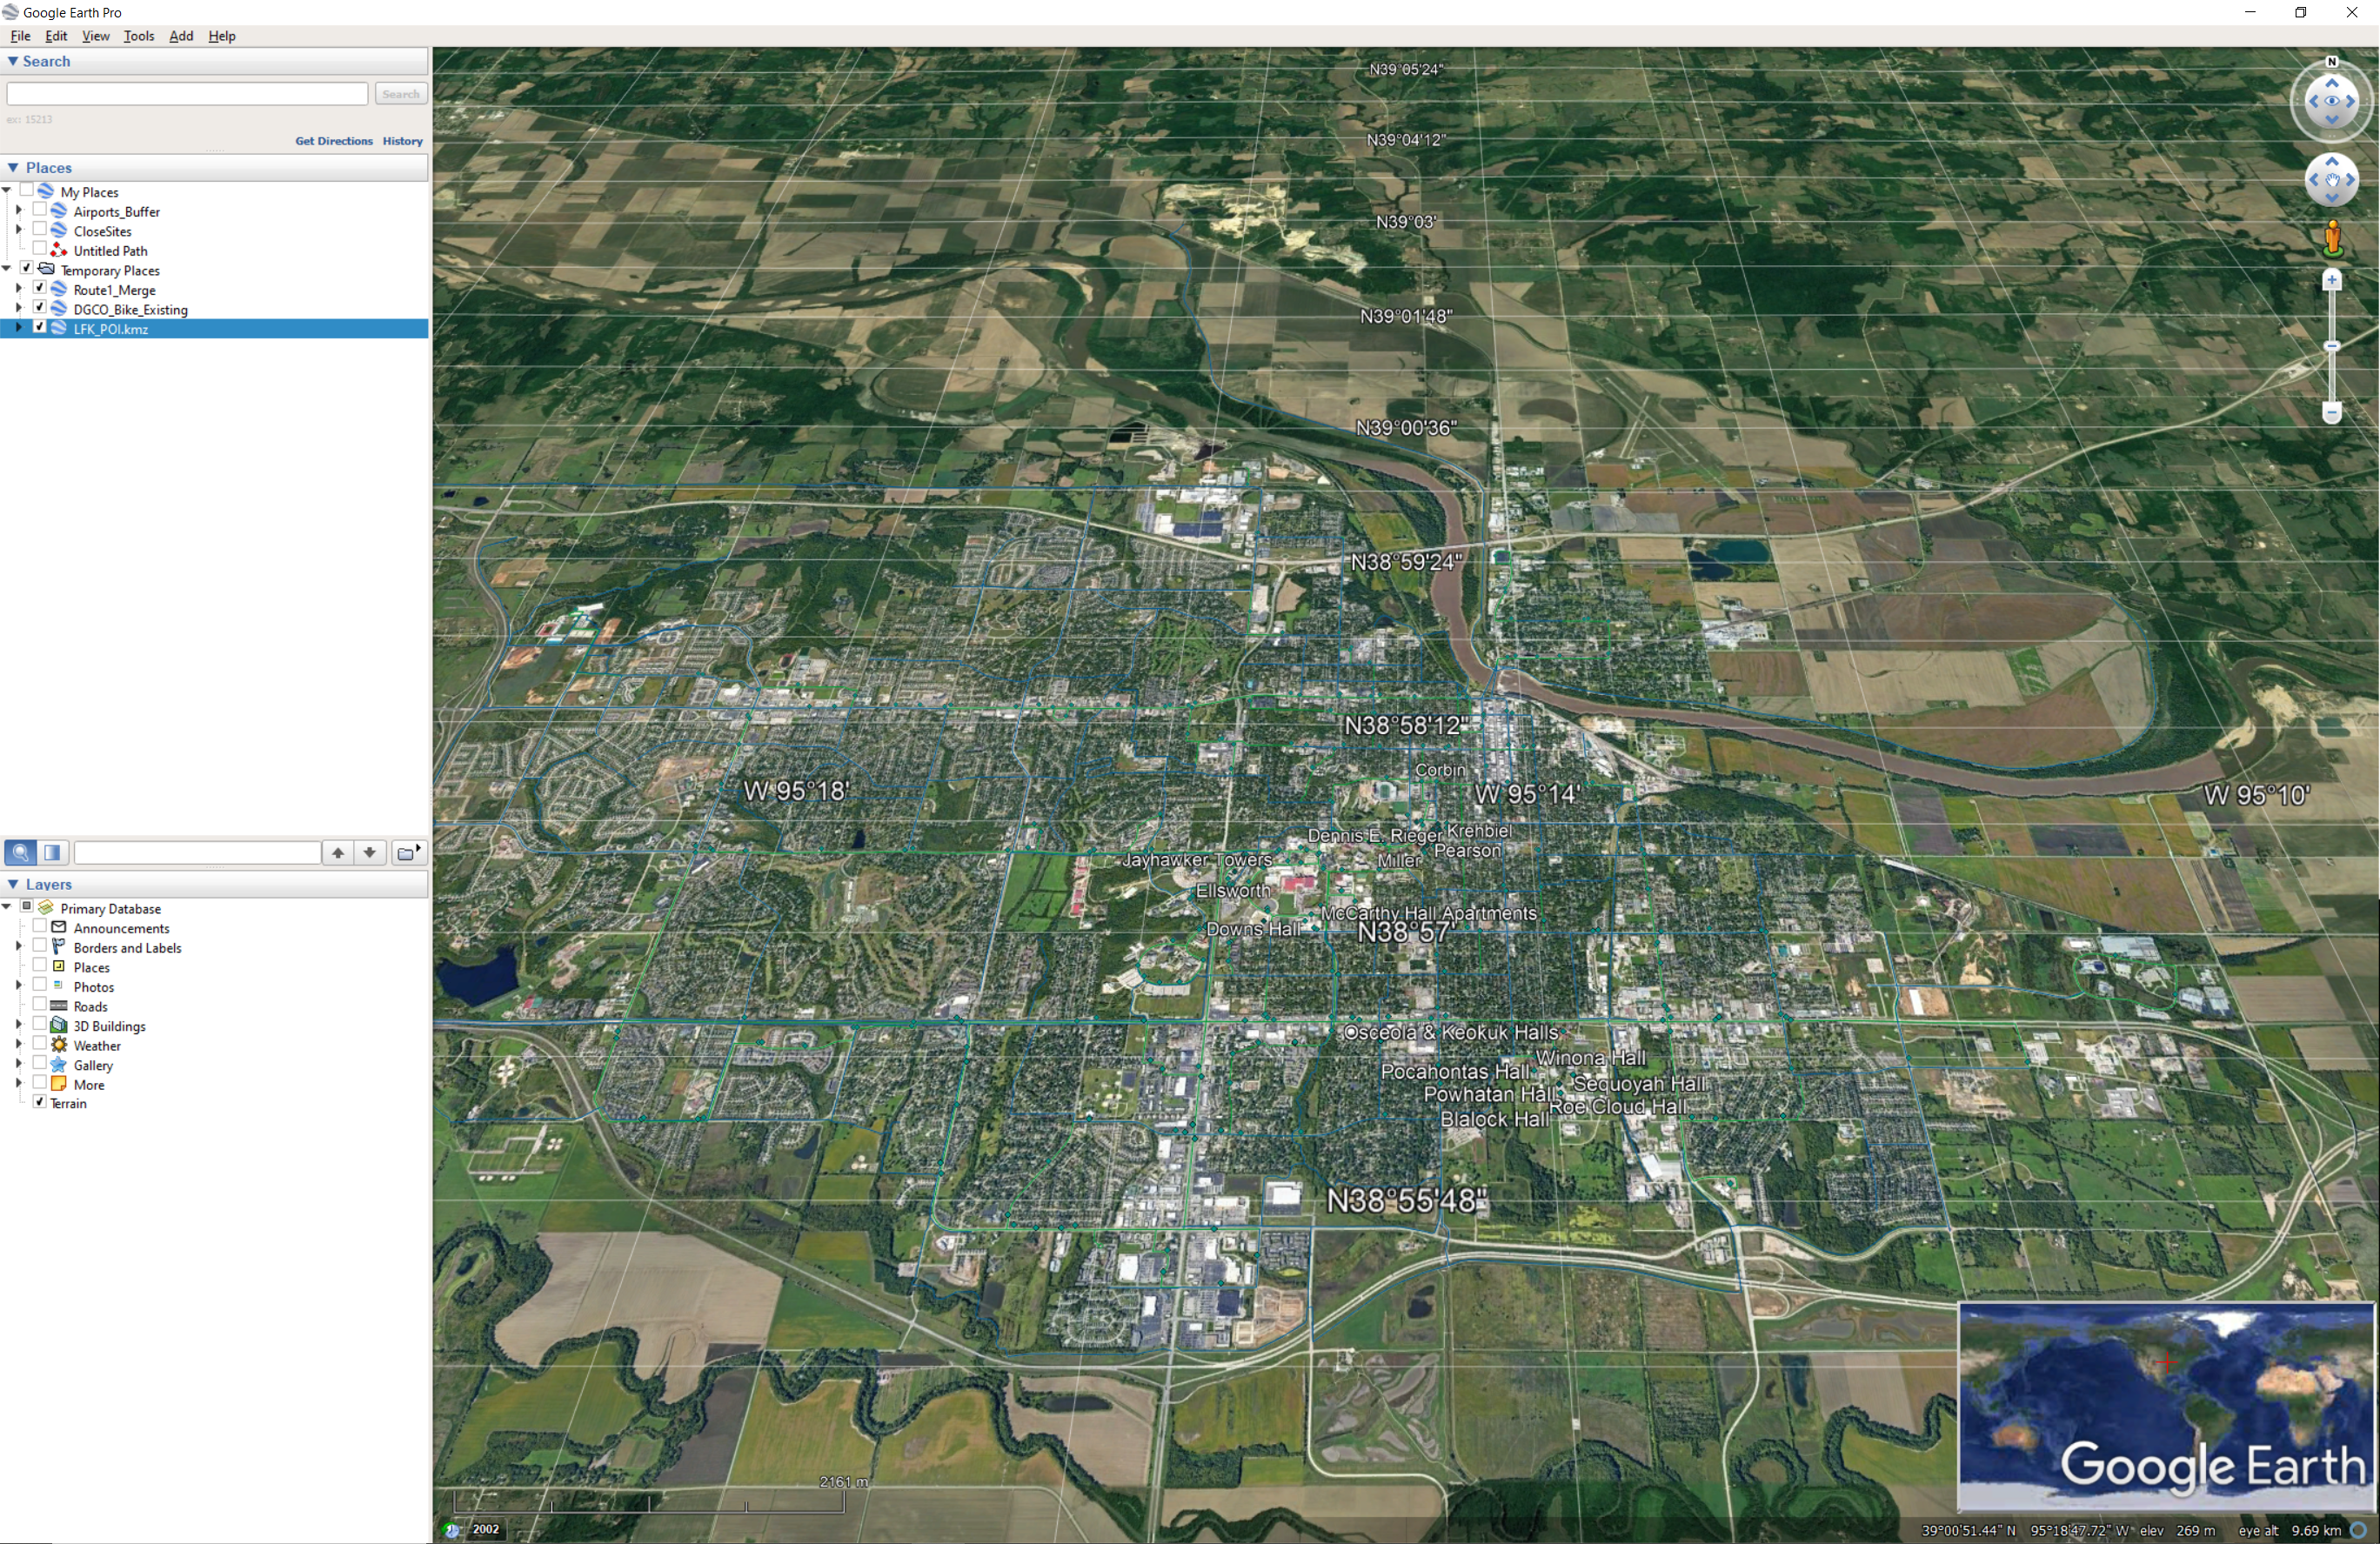
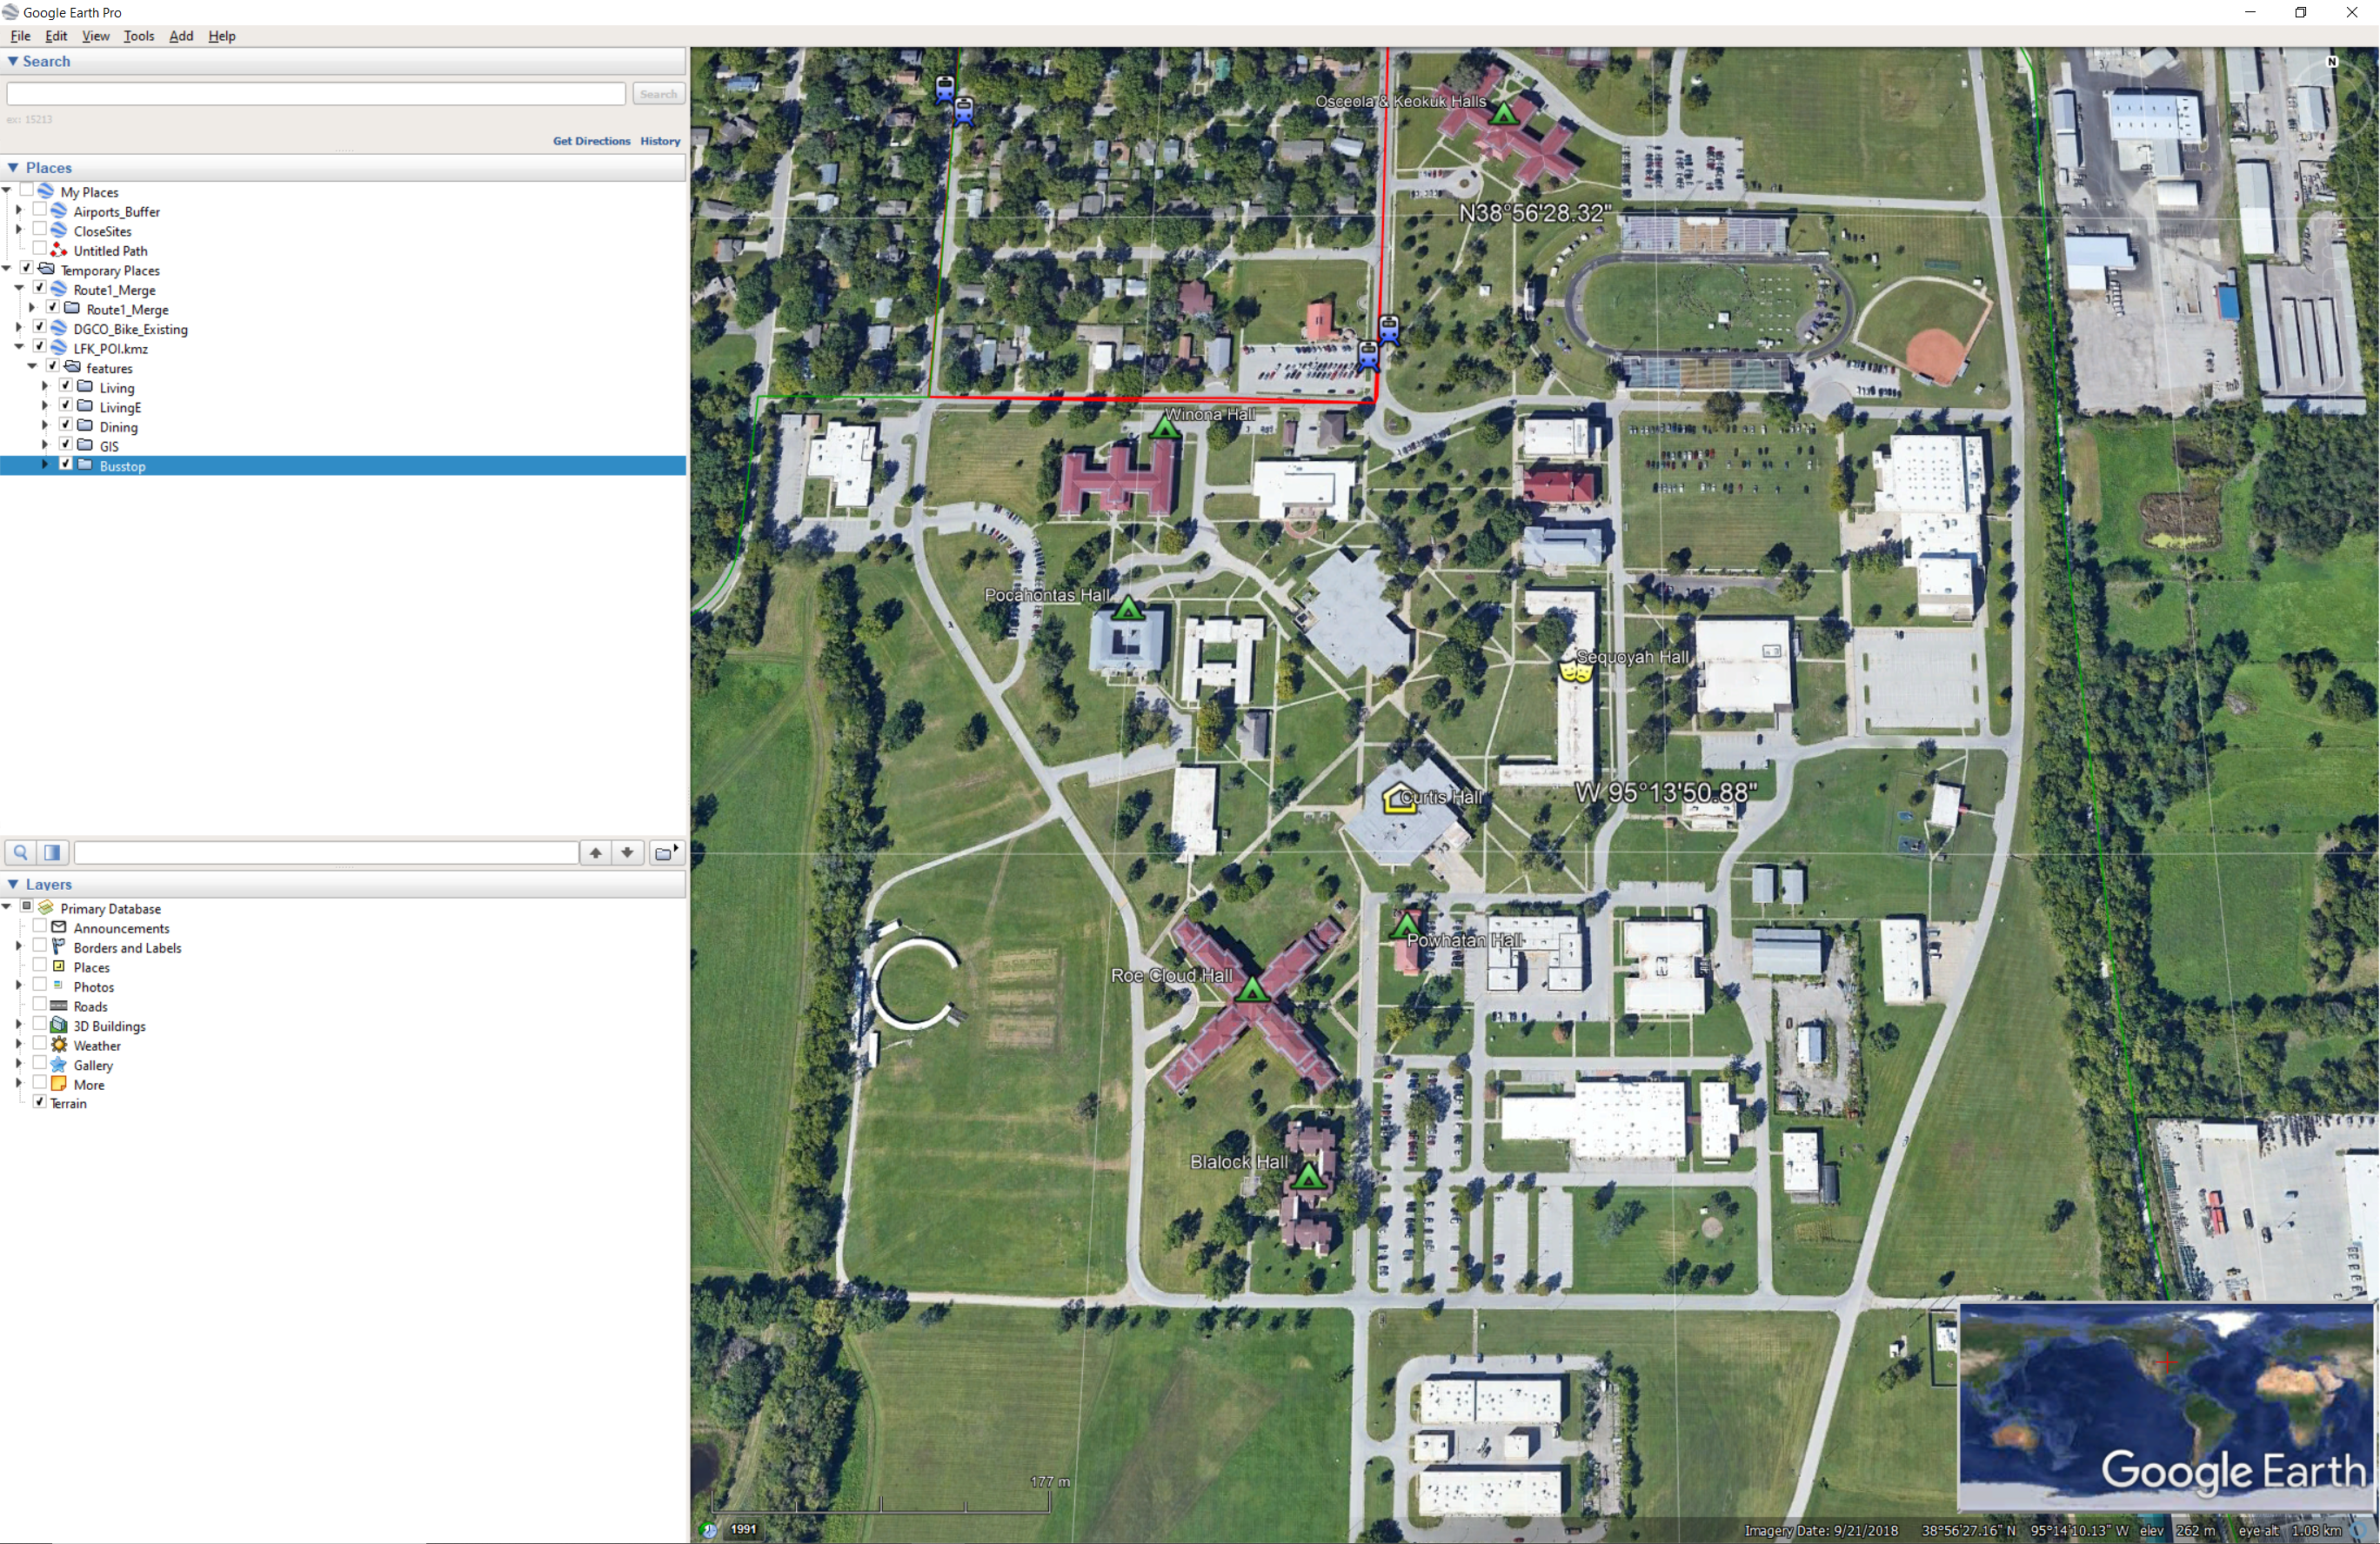
There are several means of symbolizing features in Google Earth. We can do so feature by feature, or in groups. If you right click on a feature and go to properties, you can change how it’s symbolized. If you change the properties for a folder, you apply that symbology to every feature within that folder. For now, clock on the Route1_Merge file and go to style. Lets change these bus routes to red, and the width to 2. Afterwards, right click on the folder for the bike routes, and change those properties to green and 1.5 width. When done, your map should look like so:

The LFK_POI folder has several sub-folders. These folders are separated into the following categories:
- Living: all dorms on the Haskell and KU campuses
- LivingE: Dorms with a dining hall inside
- Dining: dining halls and other places around campus to eat
- GIS Buildings where GIS instruction occurs
- Busstops: these are bus stops…
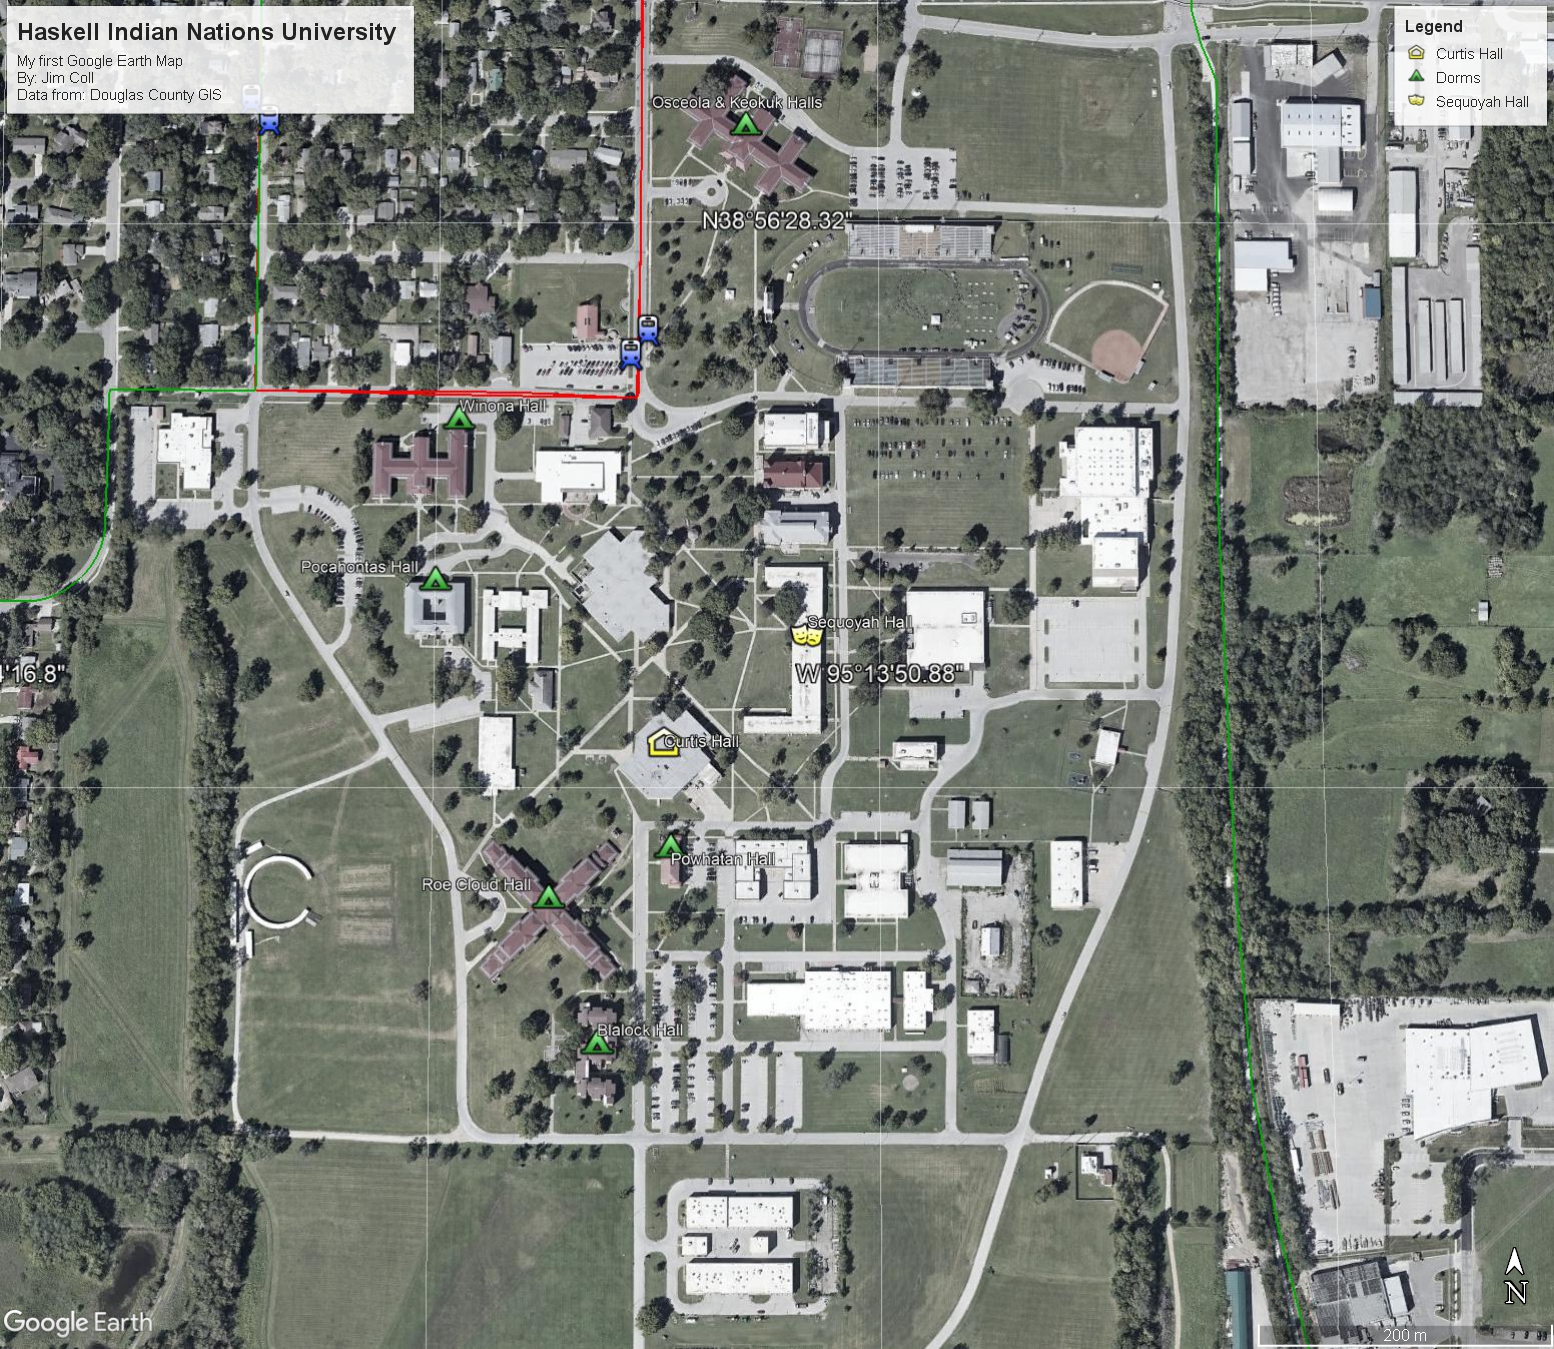
If you open the properties on these, you can change the symbol used to show these features by clicking on the icon. Change these icons to something you feel is appropriate. When done, zoom into a part of campus you feel frames a nice area, your map may look like so:
Finally, let’s export our map for viewing. Go to File > Save > Save Image… This adds common map elements including Title blocks and Legend, as well as a north arrow. Fill out the pertinent information, including a relevant title, your name, and the data source (this data comes from Douglas County GIS). Finally, under Map Options at the top, you have the option of toning down the intensity of the base map. When done, export your map and submit it. Congratulations, you just made your first map!